Gesture Remote Control
Copyright © Quectel Wireless Solutions Co., Ltd. 2026. All rights reserved.
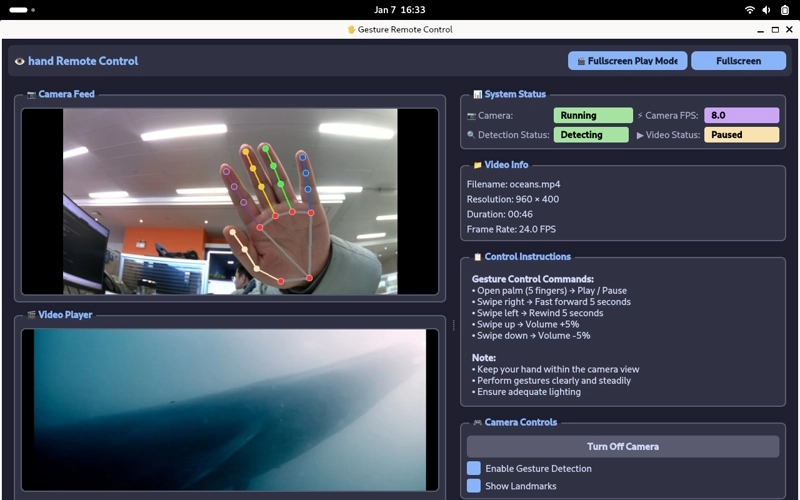
This project is a gesture-recognition–based remote video control demo implemented on the Quectel Pi H1 single-board computer.
The system captures hand images through a camera and uses an AI gesture-recognition model to enable natural interactions such as remote control of video playback, progress, and volume.
Development Resource Summary
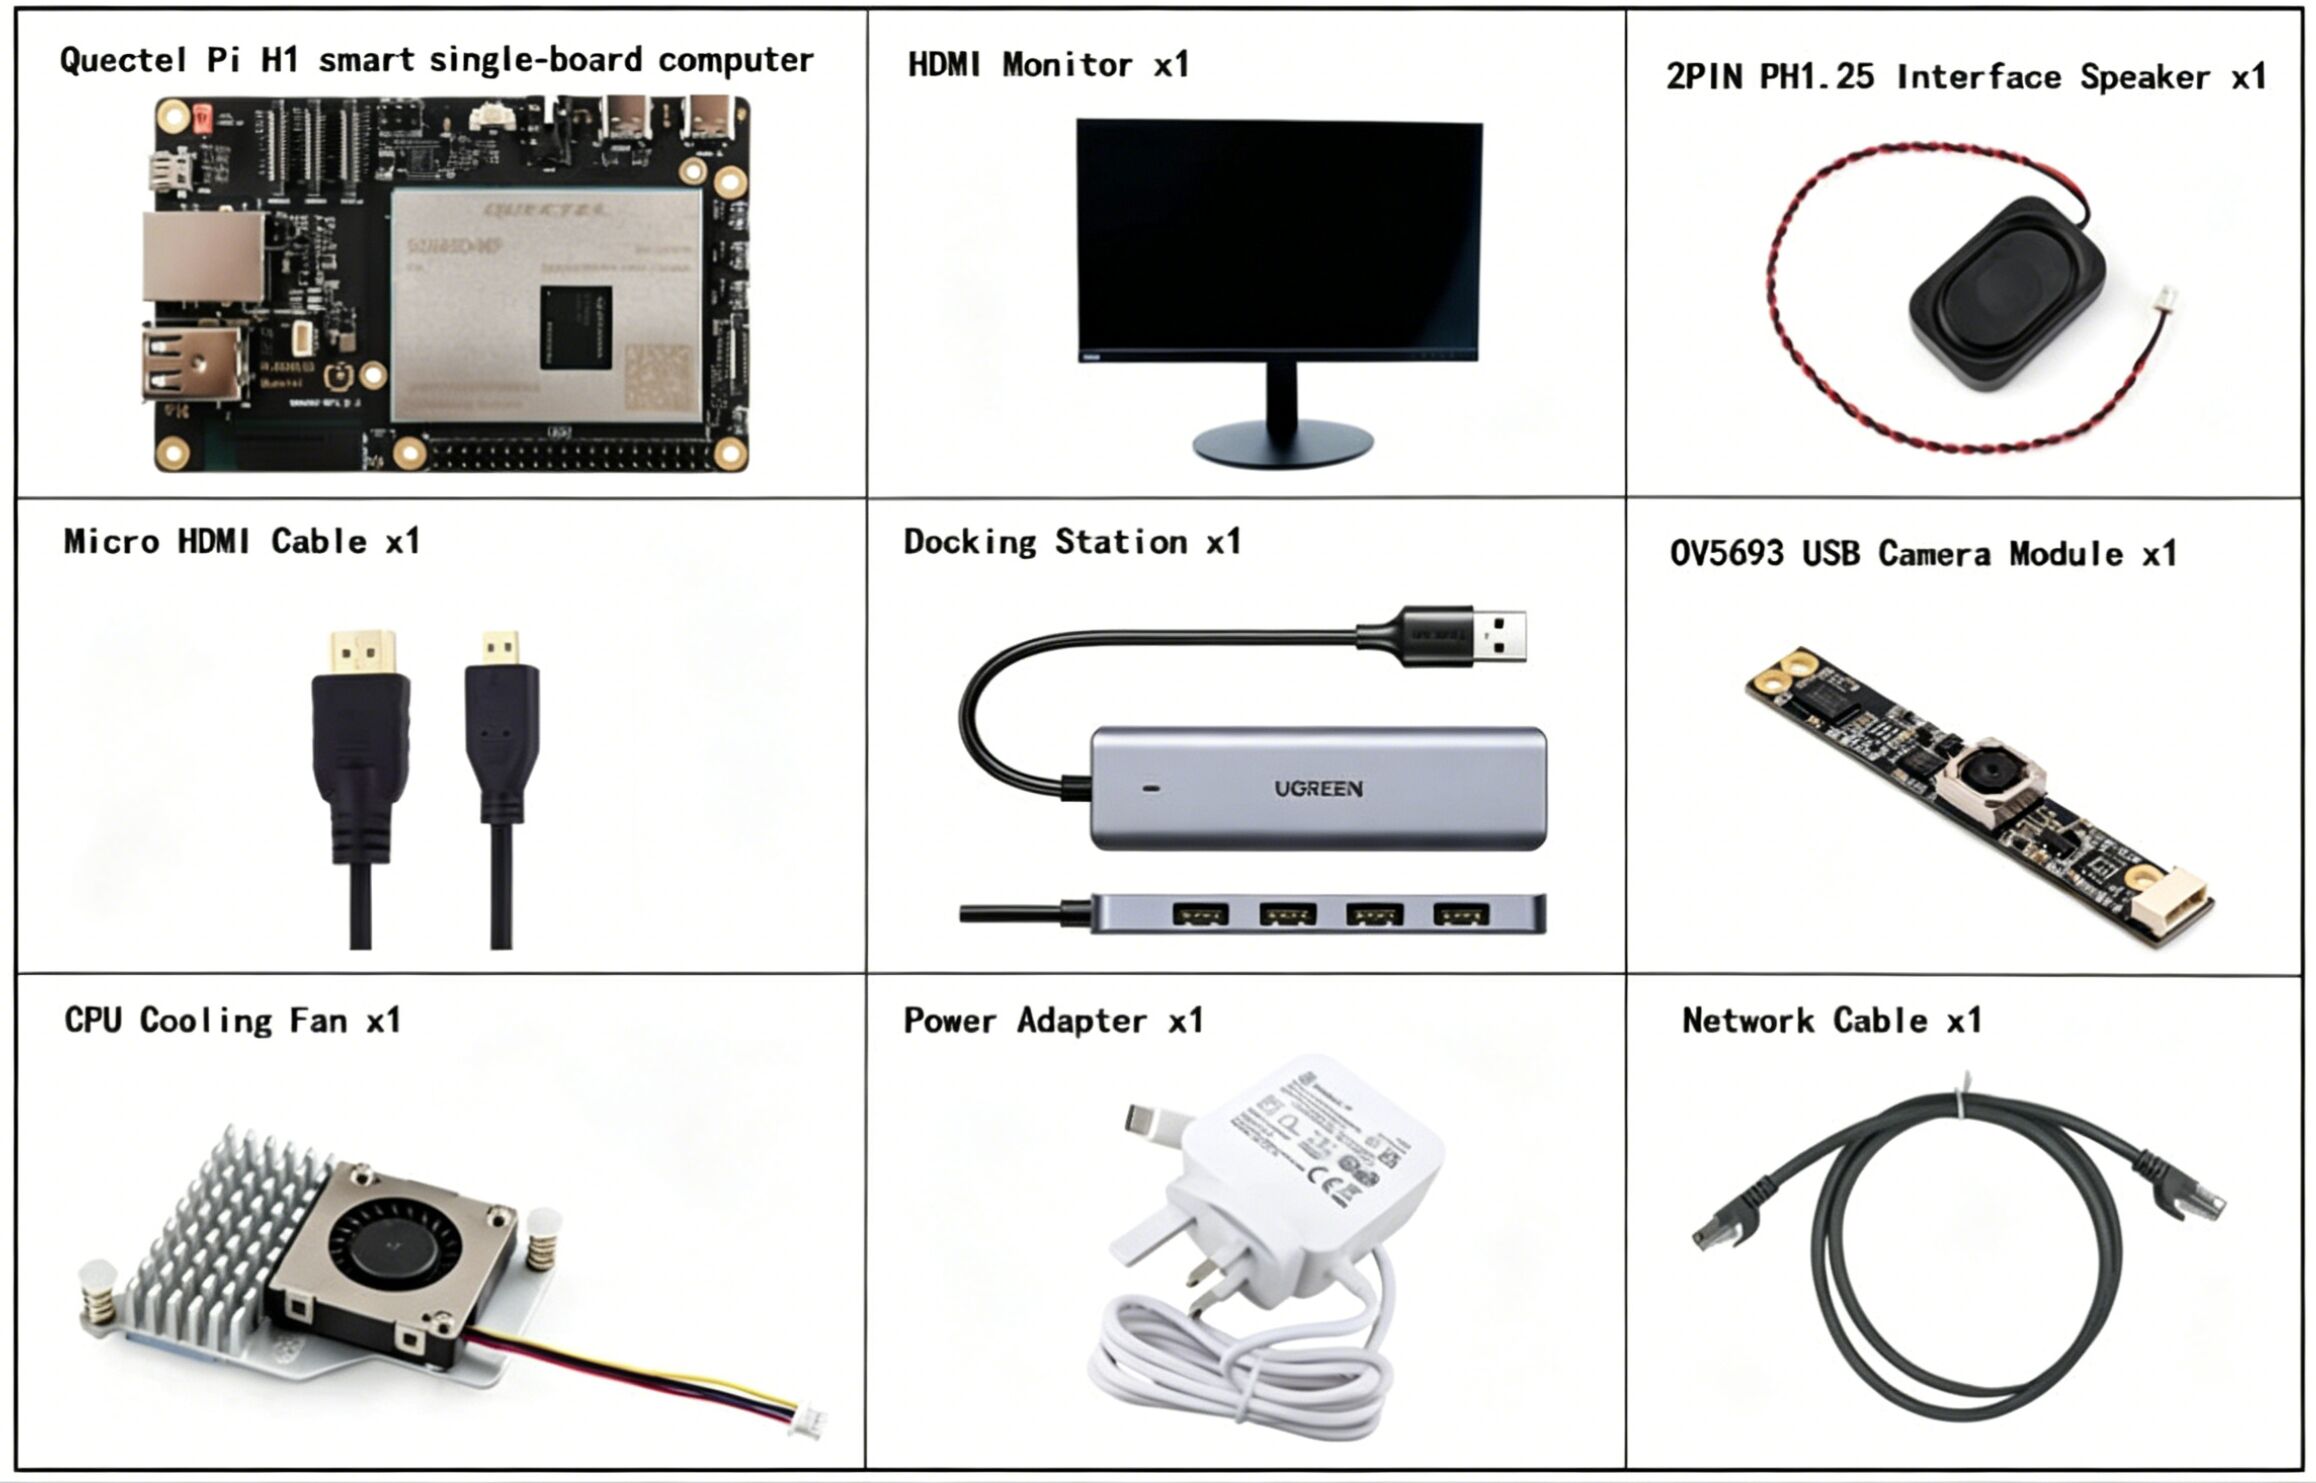
Component List
The listed development accessories are provided for reference only. Different development environments may vary. For example, if you are developing via SSH remote connection, the USB expansion dock may not be necessary, and the display monitor can also be replaced as needed.
Component Name |
Quantity |
Specifications |
|---|---|---|
Quectel Pi H1 smart single-board computer |
1 |
Quectel Pi H1 Smart Ecosystem Development Board |
USB-C Power Cable Charger |
1 |
27W USB Type-C Interface Charger 1.2m Cable Length China Standard Power PD Power Suitable for Raspberry Pi 5 |
Micro HDMI Cable |
1 |
Specification: Micro HDMI 2.0; Cable Length: 1m; Interface: HDMI-A (male)-HDMI-D (male) |
Ethernet Cable |
1 |
Cable Length: 1m; Transmission Rate: Gigabit |
CPU Heat Sink Fan |
1 |
Raspberry Pi 5 Official Active Cooler with Thermal Pad |
2PIN PH1.25 Interface Speaker |
1 |
2030 Cavity Speaker Type B, 8Ω 2W, High-quality Sound, Compact Size, 2PIN PH1.25 Connector |
USB Hub |
1 |
UGREEN USB 3.0 Hub |
USB Camera Module |
1 |
OV5693 USB Camera Module |
Display |
1 |
24-inch HDMI Monitor |
Component Physical Reference
Quick Start
Development Preparation
The Quectel Pi H1 single-board computer comes pre-installed with Debian 13 system image, so no additional image burning is required. Follow the steps below to get started.
Hardware Connection
Complete all hardware connection steps below. The numbering matches the interface diagram:
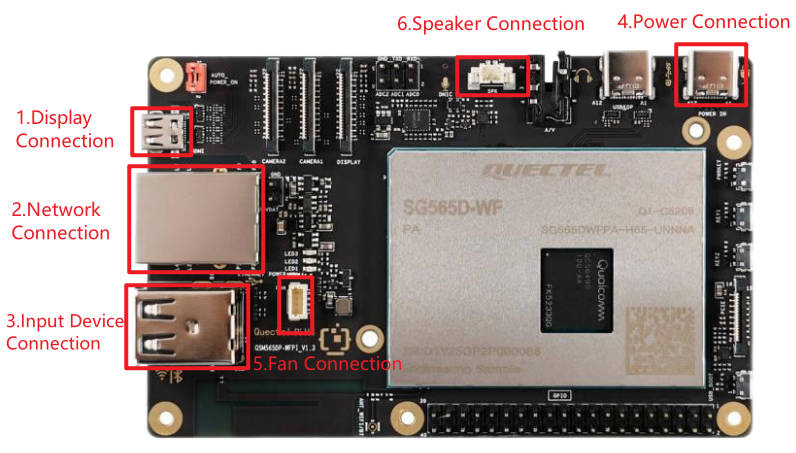
Display connection: Connect one end of the Micro HDMI cable to the Micro HDMI port on the smart single-board computer, and the other end to the HDMI port on the monitor.
Network connection: Connect one end of the Ethernet cable to the Gigabit Ethernet port on the smart single-board computer, and the other end to the router’s port (make sure the router is connected to the internet).
Input device connection: Connect USB keyboard and mouse to the USB ports on the hub, then connect the hub to a USB port on the smart single-board computer. For wireless devices, insert the receiver into a USB port on the hub. Then connect the OV5693 camera module to another USB port on the smart single-board computer.
Power connection: Connect the USB-A end of the power cable to the power adapter, and the USB-C end to the power port on the smart single-board computer (usually labeled POWER IN).
Heat sink fan connection: First, insert the cooling fan’s ribbon cable into the FAN slot of the smart single-board computer. Then, fix the two ends of the heat sink into the reserved holes on the board.
Speaker connection: Connect the 2PIN PH1.25 interface speaker to the SPK slot on the smart single-board computer.
Completed Connection Reference
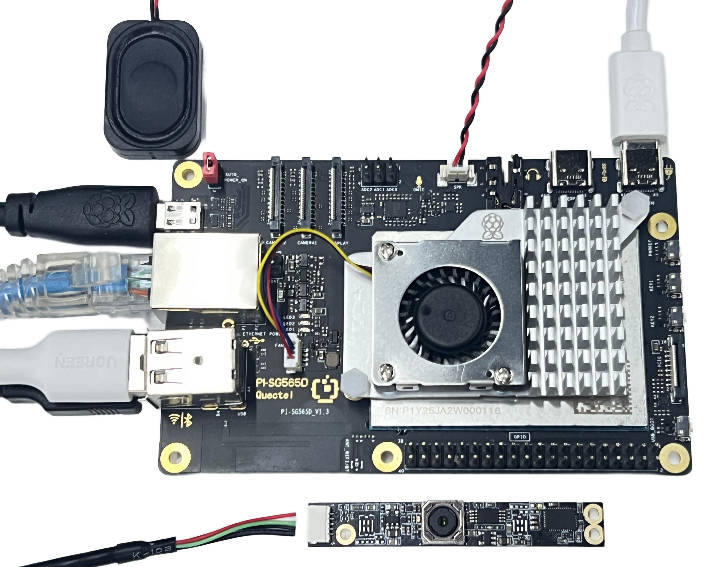
After completing the connections above, you do not need to disconnect connected accessories such as the camera, speaker, or monitor during subsequent shutdown or reboot. Keep them connected.
Project Implementation
Clone the project using git.
sudo apt update
sudo apt install -y gitgit clone https://github.com/Quectel-Pi/demo-gesture-remote-control.git
After execution, a demo-gesture-remote-control folder should be created in the current directory.
Run the following commands in sequence on the board’s terminal. If the terminal shows
Deployment complete, deployment is successful.
cd demo-gesture-remote-control
sudo chmod 755 install.sh
./install.sh
If an error occurs while running ./install.sh, or the terminal does not show Deployment complete, do not continue to the next steps yet. Re-run the installation script from the project root and make sure network connectivity is normal.
Reopen the terminal and verify the Python version. If the output is
Python 3.10.15, the installation is successful.
python3 --version
Run the program
Run the main.py startup script in the src directory. If the program starts successfully, a camera preview window will open.
cd demo-gesture-remote-control/src/
python3 main.py
Gesture Mapping
Ensure the camera faces the gesture interaction area under stable lighting conditions.
Gesture |
Function |
|---|---|
Open palm (5 fingers) |
Play / Pause |
Finger slide right |
Fast forward 5 seconds |
Finger slide left |
Rewind 5 seconds |
Finger slide up |
Volume +5% |
Finger slide down |
Volume -5% |
Common Issues and Solutions
Camera not recognized
Symptom:
No available camera device found
Solutions:
Check that the camera is properly connected to the USB port.
Verify the camera device node with:
ls -la /dev/video*
Try other USB ports.
If the camera still fails, use a powered USB hub and connect external power.
Re-plug the USB camera.
No module named cv2 when running main.py
Symptom:
ModuleNotFoundError: No module named 'cv2'
Solutions:
This usually means install.sh did not complete successfully. Return to the project root and run the installation script again:
cd demo-gesture-remote-control
./install.sh
Application Demonstration
Technical Support and Contributions
If you encounter any issues during use, please submit technical inquiries on the Quectel Official Forum. Our technical support team will respond promptly.
Project open-source repository: https://github.com/Quectel-Pi/demo-gesture-remote-control
We welcome you to submit Issues to report problems or Pull Requests to contribute code improvements!