M.2 SSD hard drive
Copyright © Quectel Wireless Solutions Co., Ltd. 2026. All rights reserved.
This section describes the complete process of partitioning, formatting, mounting, and performing performance tests on an NVMe solid-state drive (using /dev/nvme0n1 as an example) under a Linux system, applicable to the Quectel Pi H1.
Hardware interface
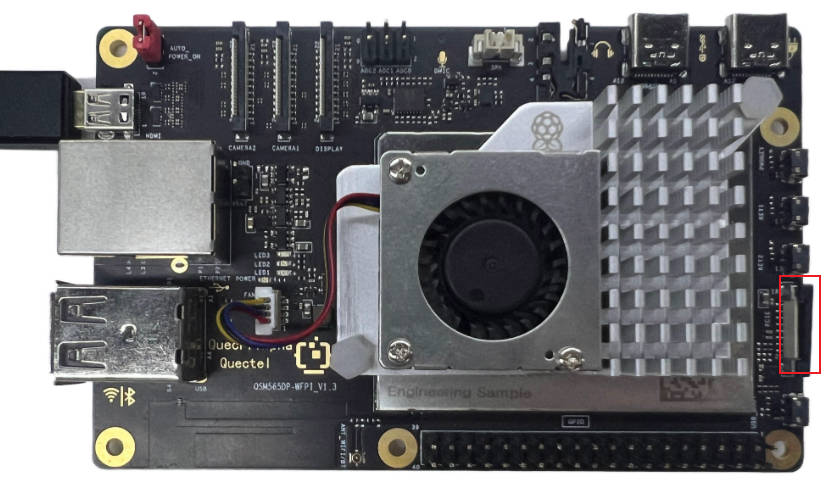
Quick start
Follow the steps below to complete the installation of the M.2 NVMe SSD:
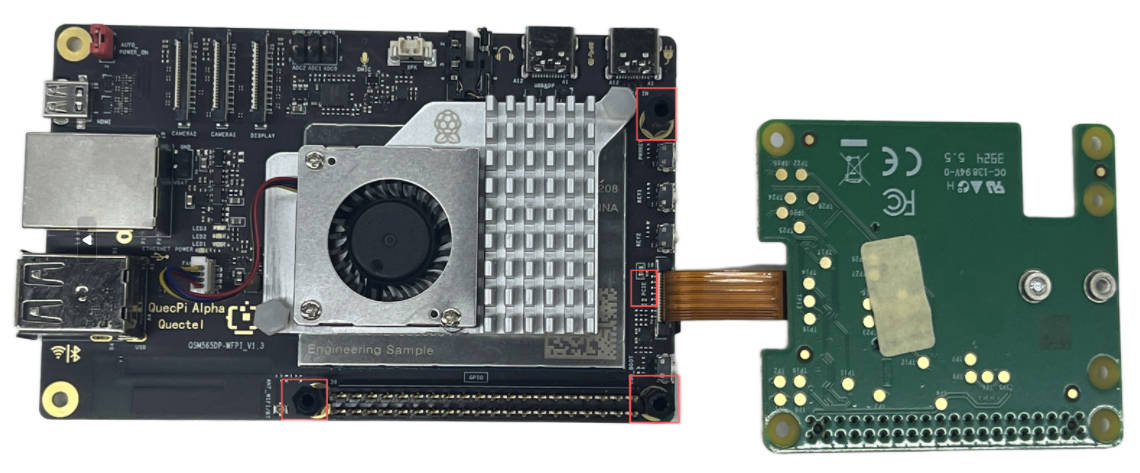
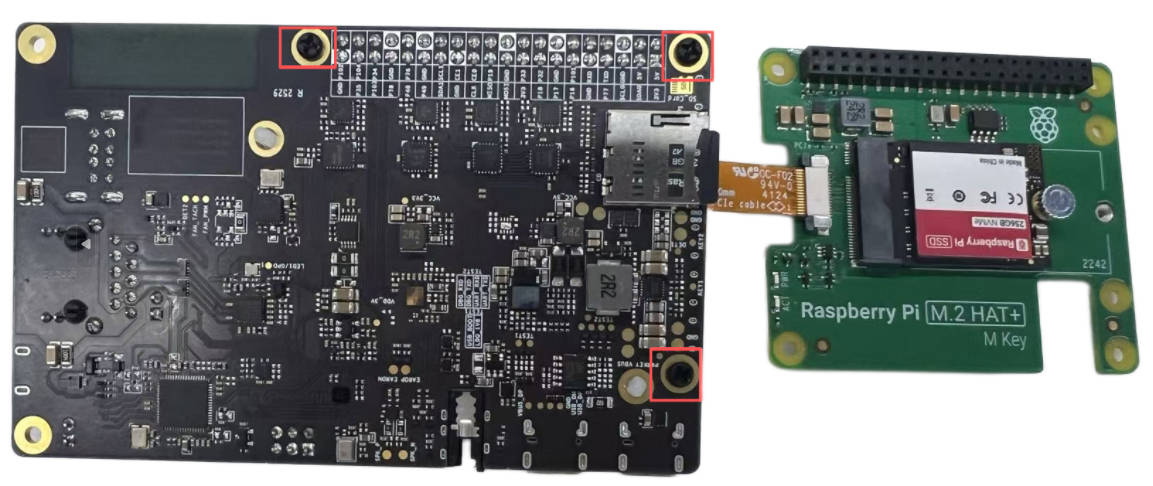
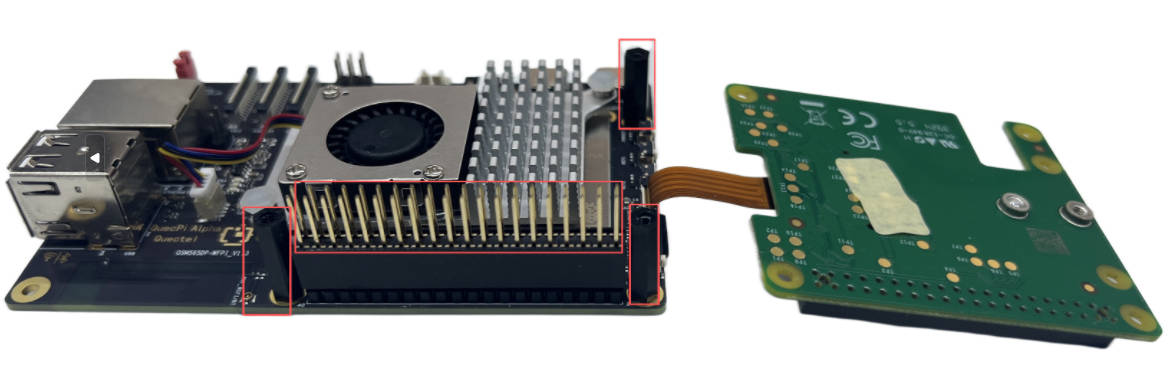
Install three nylon standoffs and secure them to the baseboard using three short screws.
Install the GPIO expansion header and press firmly to ensure all pins are fully seated.
Insert the PCIe adapter cable evenly into the PCIe interface of the single-board computer, then press down the mounting brackets on both sides to secure the cable in place.
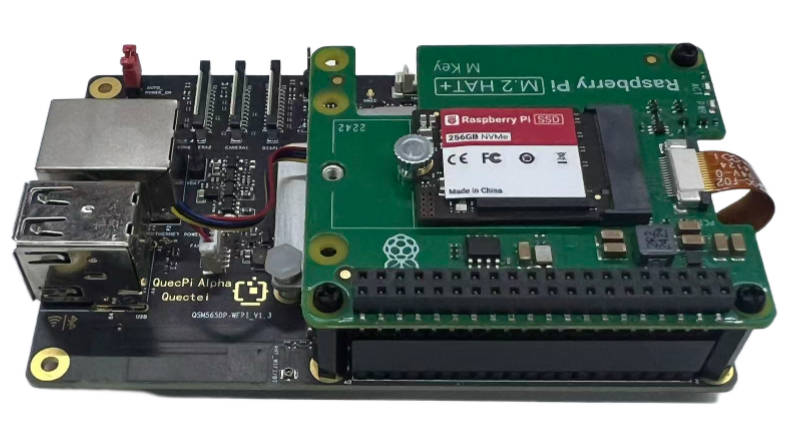
The installation reference views are shown below:
Front view:
Back view:
Side view:
Finally, place the M.2 HAT+ on top of the nylon standoffs and secure it using 3 long screws.
Function usage
Partitioning (fdisk)
Partition the NVMe device using the fdisk tool with the following steps:
Start fdisk
Execute the following command to launch fdisk and specify the target NVMe device:
fdisk /dev/nvme0n1
Interactive operation steps
After entering the fdisk interface, perform the following actions:
Create a GUID Partition Table (GPT)
Enter g and press “Enter” to create a GPT (recommended for large‑capacity devices):
Command (m for help): g
Created a new GPT disklabel (GUID: XXXXXXXX-XXXX-XXXX-XXXX-XXXXXXXXXXXX)
Create a new partition
Enter n and press “Enter” to create a new partition. Keep the default values for partition number, start sector, end sector (this uses the full available space):
Command (m for help): n
Partition number (1-128, default 1):
First sector (2048-xxxxxxxxx, default 2048):
Last sector, +/-sectors or +/-size{K,M,G,T,P} (2048-xxxxxxxxx, default xxxxxx):
Created a new partition 1 of type 'Linux filesystem' and of size XX GiB.
Write the partition table
Enter w and press “Enter” to write the partition configuration to the device and exit fdisk:
Command (m for help): w
The partition table has been altered.
Calling ioctl() to re-read partition table.
Syncing disks.
After the operation completes, the system will generate the new partition /dev/nvme0n1p1 (p1 indicates the first partition).
Format the partition (EXT4)
Use the mkfs.ext4 tool to format the new partition into the EXT4 file system (suitable for most Linux environments):
mkfs.ext4 /dev/nvme0n1p1
After execution, the formatting progress will be displayed.
Example output:
mke2fs 1.46.5 (30-Dec-2021)
Creating filesystem with 12345678 4k blocks and 3456789 inodes
Filesystem UUID: xxxxxxxx-xxxx-xxxx-xxxx-xxxxxxxxxxxx
Superblock backups stored on blocks:
  32768, 98304, 163840, ...
Allocating group tables: done
Writing inode tables: done
Creating journal (65536 blocks): done
Writing superblocks and filesystem accounting information: done
Manually mount the partition
Create a mount directory
Use mkdir to create a directory for mounting the SSD (example path: /mnt/myssd):
mkdir -p /mnt/myssd
Mount the partition
Mount the /dev/nvme0n1p1 partition to the /mnt/myssd directory:
mount /dev/nvme0n1p1 /mnt/myssd
You can verify the mounting success using the df -h command. If the output includes /dev/nvme0n1p1 and /mnt/myssd, the mounting is working correctly:
df -h
Filesystem      Size  Used Avail Use% Mounted on
/dev/nvme0n1p1  100G   5G   95G   5% /mnt/myssd
Configure auto-mount (Effective after reboot)
Modify /etc/fstab to automatically mount the partition at system startup.
Edit fstab
Open the file with nano editor (or any preferred editor such as vim):
Add mount configuration
Append the following line to the file to specify the partition, mount point, file system type, and mount parameters:
/dev/nvme0n1p1 /mnt/myssd ext4 defaults 0 2
Performance testing (Read/write speed verification)
Use the dd command to test the read/write performance of the SSD (ensure the partition is mounted during testing):
Read speed test
Create a temporary test file. Read the test file to /dev/null to measure raw read performance:
dd if=/mnt/myssd/testfile of=/dev/null bs=1G iflag=direct # iflag=direct: bypass system cache to test the real read speed1+0 records in1+0 records out
1073741824 bytes (1.1 GB, 1.0 GiB) copied, 0.852345 s, 1.3 GB/s
Write speed test
Generate a 1 GB empty file (/dev/zero as the source of zero data) to test the write speed:
dd if=/dev/zero of=/mnt/myssd/testfile bs=1G count=1 oflag=direct
1+0 records in1+0 records out
1073741824 bytes (1.1 GB, 1.0 GiB) copied, 1.245678 s, 862 MB/s
Delete test file
After testing, you can delete the temporary file using the following command:
rm /mnt/myssd/testfile