USB
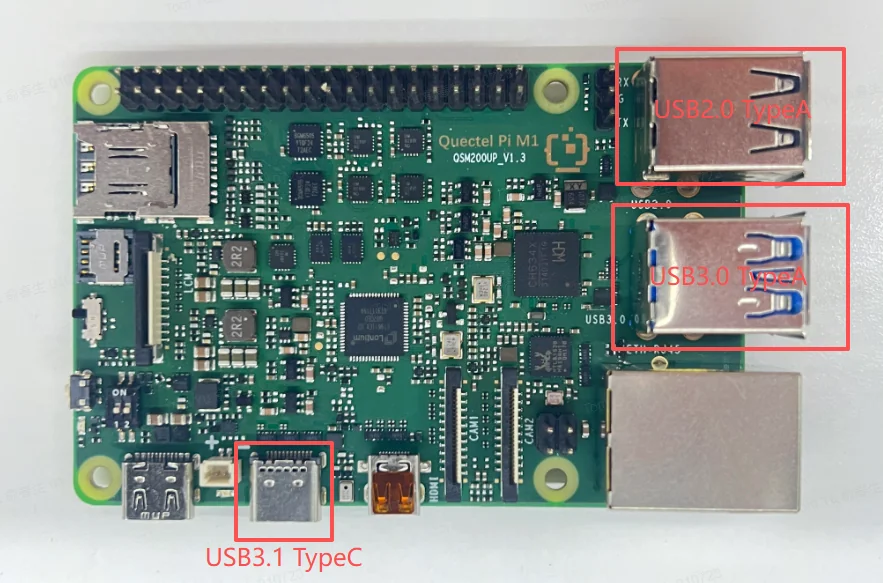
The Quectel Pi M1/L1 smart main board comes with 2 standard USB 3.0 Type-A ports, 2 standard USB 2.0 Type-A ports, and 1 USB 3.1 Type-C port. The USB 2.0 ports support a maximum data transfer rate of 480 Mbps, and the USB 3.1 port supports a maximum data transfer rate of 5 Gbps.
The Quectel Pi M1/L1 onboard core has only one USB channel. It relies on an onboard hardware DIP switch to complete mode switching, enabling two core operating modes: USB Host and USB Device. This allows hardware switching to accommodate different scenarios such as device debugging and peripheral expansion.
USB Device Mode
DIP Switch Status: Function DIP Switch 1 set to the ON position.
Operating Mode: The board acts as a USB device, recognized, powered, and managed by a host computer (PC, debugging host).
Use Cases: Firmware flashing, ADB debugging, data exchange with the host computer.
Features: In this mode, the Type-C port only accepts commands from an external host and cannot connect to USB peripherals such as flash drives, keyboards, or mice. The device itself does not output USB power. This is the core mode for device debugging and mass production flashing.
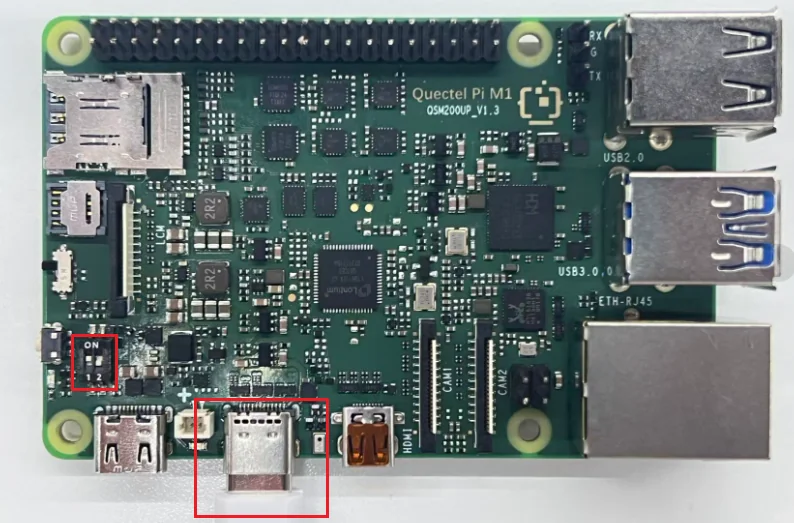
As shown above, switch DIP Switch 1 to the ON side. Connect one end of a USB cable to the Type-C port of the Quectel Pi and the other end to the PC. This completes the ADB connection.
For PC-side ADB environment setup, refer to: ADB Terminal:ADB Terminal
ADB Usage
List All Connected Devices
# Basic device list
adb devices
# Detailed device information list
adb devices -l
Check Device Status
# device, offline, unknown
adb get-state
Reboot Device
adb reboot
Interactive Mode (Enter the Device Shell)
adb shell
Single Command Mode (Execute Without Entering Shell)
adb shell df -h
File Transfer
# Upload a file
adb push test.txt /data/

# Pull a file
adb pull /data/test.txt ./

# Push a folder
adb push ./MyPhotos /data/

# Pull a folder
adb pull /data/MyPhotos ./
USB Host Mode
DIP Switch Status: Toggle the corresponding function DIP Switch 1 in the opposite direction.
Operating Mode: The device acts as a USB host controller, actively managing the connected USB devices, supplying power to peripherals, and initiating data interaction.
Use Cases: Connect peripherals such as USB flash drives, USB keyboards/mice, USB network adapters, sensors, etc., to enable data reading, human-machine interaction, and peripheral expansion.
Features: In this mode, the Type-C port can actively recognize and drive connected USB devices, output USB power, and take on the host scheduling function, meeting the peripheral expansion needs of edge computing and industrial control scenarios.
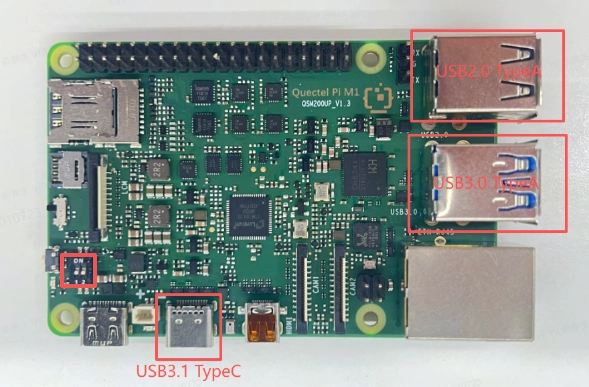
As shown above, switch DIP Switch 1 to OFF to complete the switch to Host mode.
USB Storage
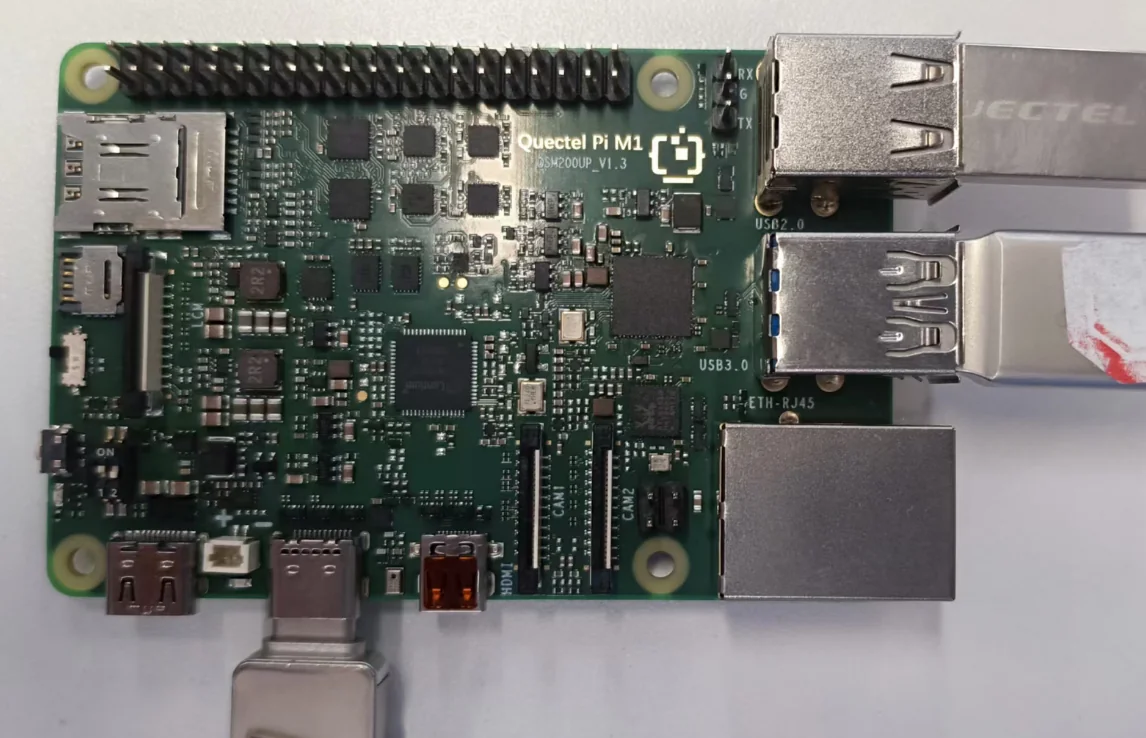
Plug a USB flash drive into the Quectel Pi board, as shown below:
Usage (GNOME)
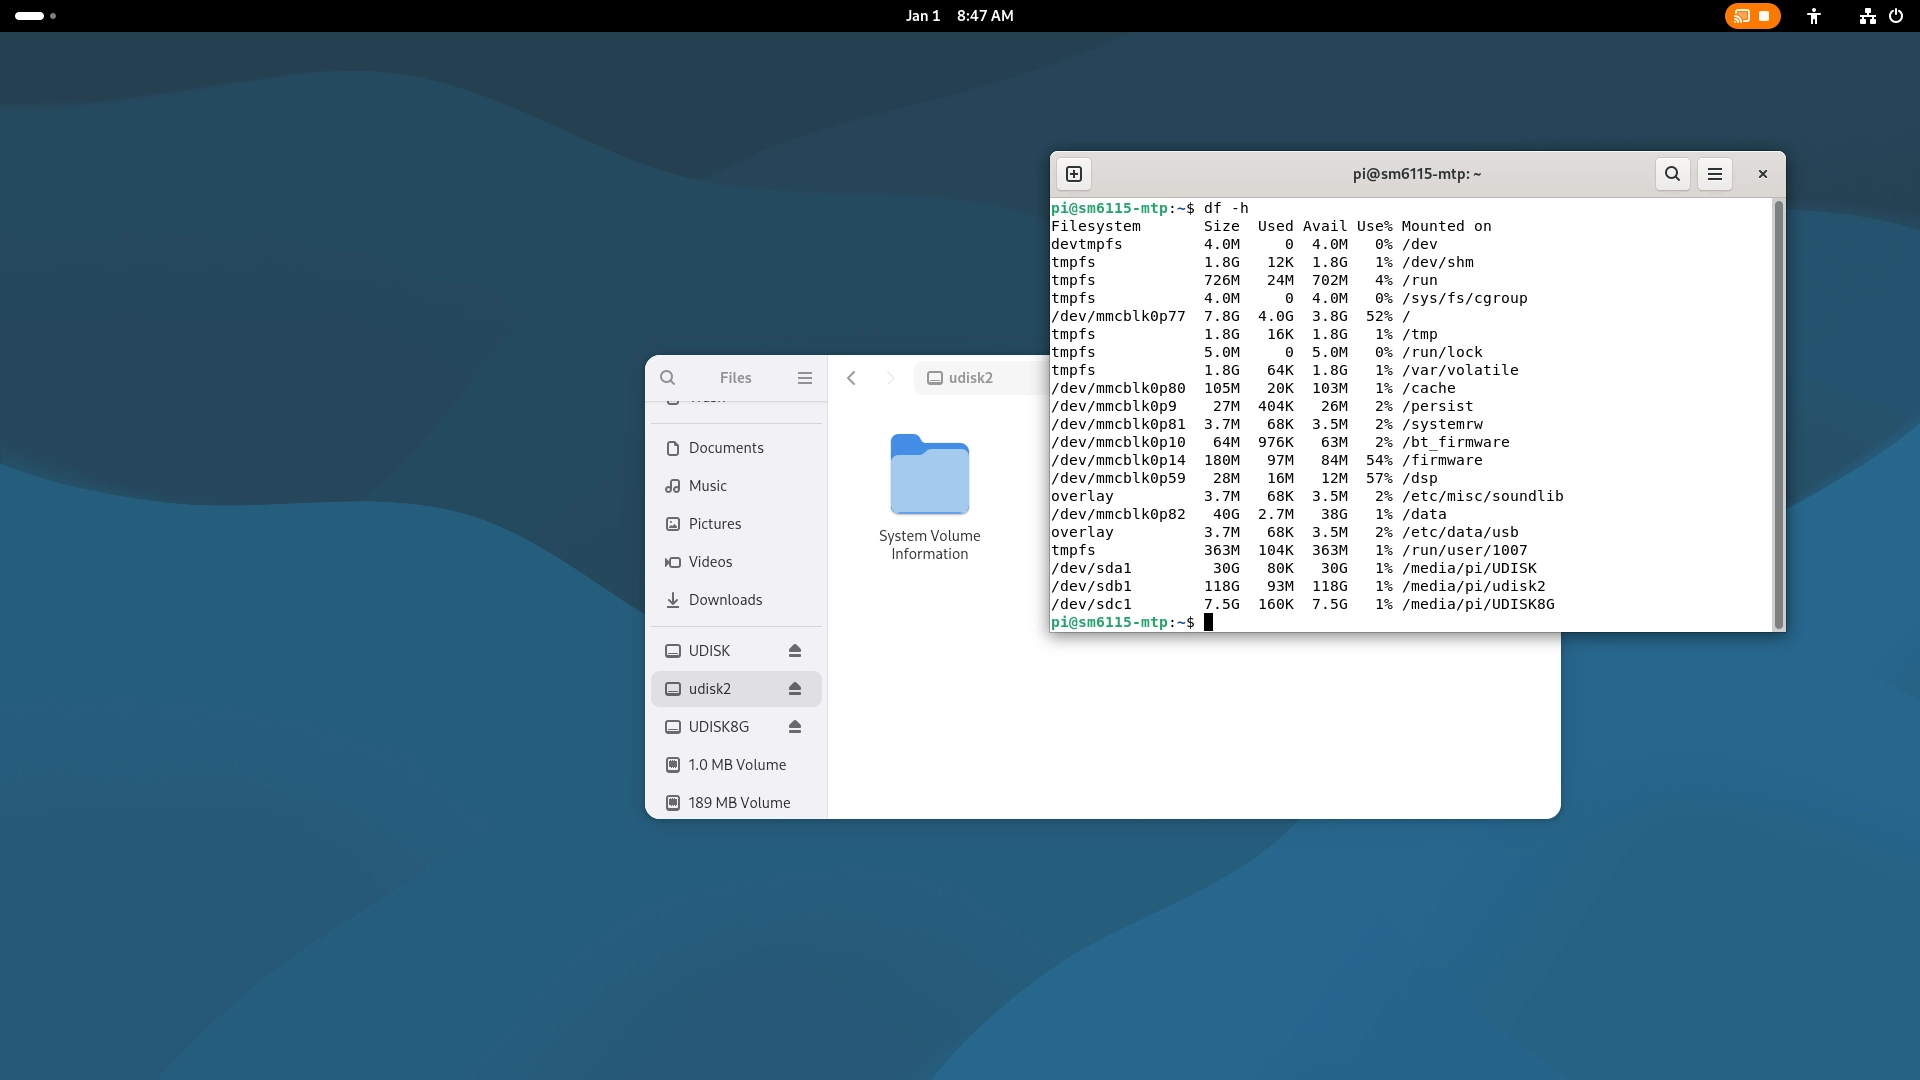
Log in to the Debian Gnome desktop and open the file manager.
Usage (Weston)
Use the df -h command via Debug UART to check whether the USB flash drive is mounted successfully.

USB Camera
View Camera Information
Run the following command in the SSH terminal or the Debug terminal to view the USB camera information recognized by the system.
dmesg | grep usb

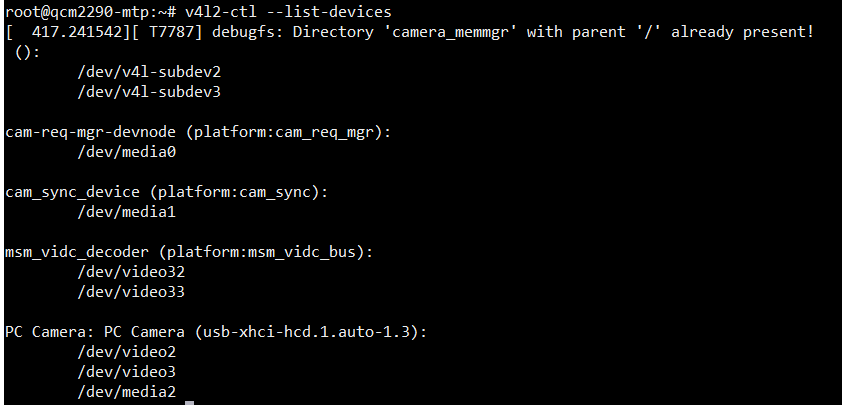
View Device Node Information
Run the following command in the SSH terminal or the Debug terminal to view the newly added device nodes.
v4l2-ctl --list-devices

# If it prompts "v4l2-ctl: command not found", run the following commands to install it after connecting to the network
sudo apt update
sudo apt install v4l-utils
View Supported Formats
Run the following command in the SSH terminal or the Debug terminal to view the formats supported by the video device node:
v4l2-ctl --list-formats-ext --device /dev/video2
Take a Photo (GNOME)
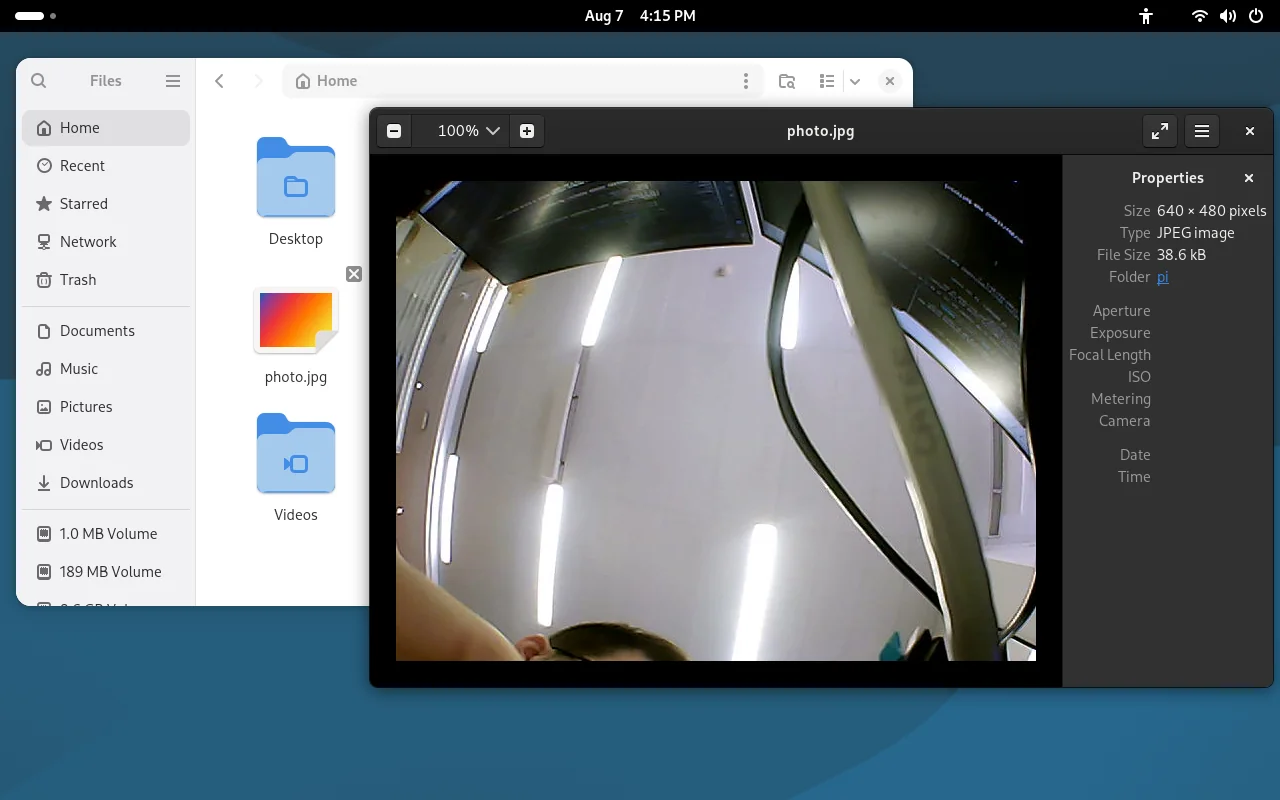
Taking the Quectel Pi M1 as an example, log in via SSH and run the following command in the SSH terminal:
gst-launch-1.0 -e v4l2src device=/dev/video2 num-buffers=1 \
    ! 'image/jpeg,width=640,height=480,framerate=30/1' \
    ! filesink location=/home/pi/photo.jpg
location=/home/pi/photo.jpg:Replace pi with the username you use to log in to the Gnome desktop.
Record a Video (GNOME)
Taking the Quectel Pi M1 as an example, run the following command in the SSH terminal. The SSH login user must be consistent with the Gnome desktop user.
# The SSH login user must be consistent with the desktop login user, otherwise $(id -u) will not match the desktop user and the preview cannot be opened
export XDG_RUNTIME_DIR=/run/user/$(id -u)
export WAYLAND_DISPLAY=wayland-0
export DBUS_SESSION_BUS_ADDRESS=unix:path=$XDG_RUNTIME_DIR/bus

gst-launch-1.0 -e v4l2src device=/dev/video2 ! "image/jpeg,width=640,height=480,framerate=30/1"! jpegdec ! videoconvert ! waylandsink async=false

Take a Photo (Weston)
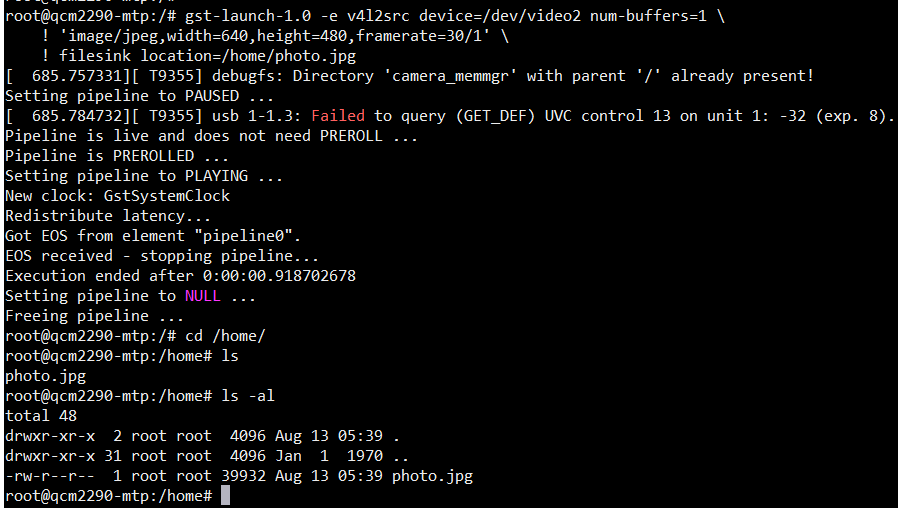
Taking the Quectel Pi L1 as an example, run the following command in the Debug terminal:
gst-launch-1.0 -e v4l2src device=/dev/video2 num-buffers=1 \
    ! 'image/jpeg,width=640,height=480,framerate=30/1' \
    ! filesink location=/home/photo.jpg
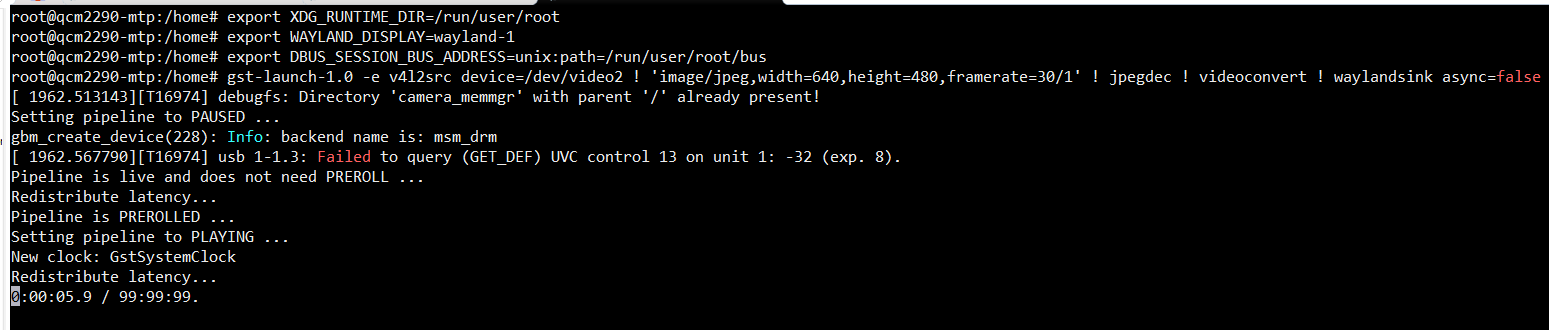
Record a Video (Weston)
Taking the Quectel Pi L1 as an example, run the following command in the Debug terminal:
export XDG_RUNTIME_DIR=/run/user/root
export WAYLAND_DISPLAY=wayland-1
export DBUS_SESSION_BUS_ADDRESS=unix:path=/run/user/root/bus

gst-launch-1.0 -e v4l2src device=/dev/video2 ! 'image/jpeg,width=640,height=480,framerate=30/1' ! jpegdec ! videoconvert ! waylandsink async=false